How to Teach Your Horse to Ground Tie
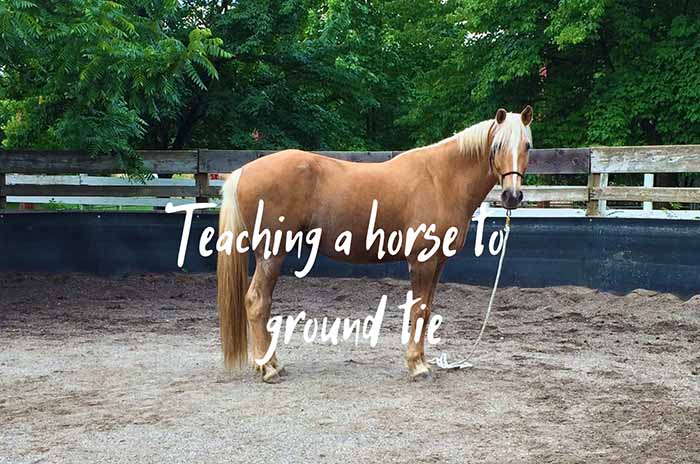
Teaching your horse to ground tie: now that’s a useful technique for any horse owner. I’ve struggled with it a bit myself in my early days, but anticipating a horse’s reactions and knowing a thing or two about the way it thinks has helped me greatly. I’m here to share some of my experiences with you so that you might form a better relationship with your own horse.
What does it mean for a horse to ground tie? Basically, a horse that can ground tie will stand still and focus solely on its handler on command. Groundwork is a very important part of any horse training routine, and teaching a horse to ground tie is a fantastic achievement that paves the way towards a fruitful and respectful relationship between a horse and its owner.
The important thing is for your horse to recognize you as its herd leader in your small herd of two. The horse should know that it can trust you and follow you. Once you command it to ground tie, it should do so without requiring any further input. The horse should stand still until you instruct him otherwise. Making sure that your horse listens to you while you’re on the ground is no walk in the park. It requires quite a bit of work and patience, but it’s mandatory that your horse accepts you as its leader when you dismount.
This is especially true if you want to dismount for whatever reason and check your surroundings on foot. Or maybe you want to perform a task without having to worry that your horse will wander off.
Preparing beforehand.
Before you begin teaching your horse how to ground tie, you’ll need to do a bit of preparation. As a trainer, it’s important for you to know exactly what to expect. What’s expected of you and what you can expect from your horse in turn.
Equipment: a 12- or 15-foot training lead with a knot attachment, as well as a rope halter. You’ll also need a bridle with split or loop reins as well as a regular saddle. Make sure that the loop reins are over the horse’s head in order to prevent it from stepping on them or getting tangled in them.
Basic technique: you’ll ask your horse to stop moving and you’ll correct it whenever it attempts to move again. Whenever you’ll see it trying to take a step, you’ll shake the training lead toward his halter. As you progress, you’ll be able to lay down the rope and walk a few steps away without the horse following you. Now that we’ve covered the basics, let’s take a closer look at each training step.
Teaching the horse to stand still.
Standing still on command doesn’t really come naturally for horses. They’re used to the “mental” freedom of being able to bolt at any given moment and whenever they please. That applies to wild horses, though. The ones we keep around as livestock and companions should see us as their leader and should rely on our best judgment in any situation.
In order to teach your horse how to stand still, you’ll first need to outfit it with the rope halter and lead. The longer the lead, the more you’ll be able to step away from your horse in order to test its ability to stand still. Ask the horse to stand normally on an even surface, but without leaning or cocking its foot.
Now, loosely hold the training lead and take up a position in front of your horse, but slightly to one side. From this point on, whenever you’ll want your horse to stand still, you’ll have to face him directly. He will pick this up as a cue.
Say “whoa,” signaling him to stop, then keep a close eye for any further movement. As soon as the horse picks up a foot and tries to move or moves its head beyond its shoulders, correct him immediately within 3 seconds. The correction is easy to perform: just flick your wrist in order to send a wave through the lead line. The wave will cause the knot I mentioned before to hit the horse in its chin. The sooner you issue the correction, the more likely it is that your horse will understand its meaning.
Laying down the lead.
Your horse acknowledges you as its leader now, but there’s still some work to be done. It’s time to test the limits of your horse’s respect by laying down the lead. To do this, ask your horse to stand squarely in one spot, take a few steps back facing the horse, and then drop the lead completely while still holding the end of it.
Say “whoa” and check your horse for any movement. If it tries to take a step or lean its head too much, send a large wave through the lead (with more force this time) so that the knot does its business once again. Ideally, the horse should now take a step back and look concerned.
The goal is to practice enough until you’re able to move around your horse without him moving at all.
Final test: walking away.
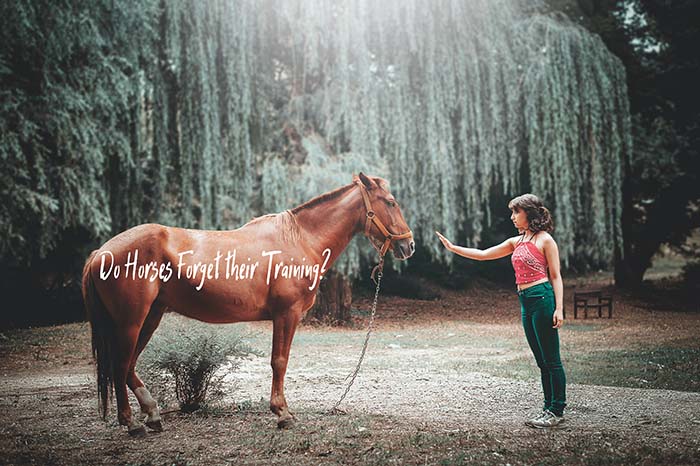
Ask your horse to stand in one spot, and then let the lead hang down completely from the halter, touching the ground. At this point, you’re no longer controlling the horse using the lead, but it should still listen to you and stay in one place as you walk a few steps away from him.
If it tries to move, say “whoa” and quickly grab the lead in order to issue a correction. If it managed to move away from its initial location, move it back to it and try again. Keep repeating this exercise until the horse stands completely still even as you walk a few steps away. Then take things further and walk away in any direction, even around him.
If you step away from the horse while still facing it, you’re likely to achieve better results. But that’s not our goal here. We need to make sure that the horse will ground tie even if we move around him and away from him. Practice until you have achieved this result, and then you’ll know that your horse can indeed ground tie.
How long does it take to teach a horse to ground tie?
You can perform these exercises for 10 to 15 minutes until the horse stands still for a few minutes without needing a correction. You should then practice every day until you achieve your desired result: the horse should focus only on you while you’re on the ground, and will not move unless instructed to.
Horses have comfort zones and training them around a stall or another familiar place should yield quicker results. However, make sure to move away from the horse’s comfort zone as you progress. The goal is for him to be able to ground tie in an unfamiliar setting.
Using regular tack.
Practicing with a halter and lead rope is one thing, but your horse will need to ground tie while wearing its usual tack as well. So put on its regular tack and let the reins hang down mimicking the lead rope. Ask the horse to stand squarely in one spot, say “whoa” and step away.
If you spot any movement, say “whoa” again and move quickly towards the horse in order to correct its standing. Pick up the reins in a calm manner, with care, and lead the horse back to its starting position, issuing a final “whoa” as you reach it. The reins shouldn’t be used for punishment, but you can use a bit of bit pressure in order to get your point across.
Final words.
For the final test, you should be able to walk all the way around your horse while it stands in place. You should also be able to walk out of its sight and go about your business without having to worry about him moving or leaving. The horse should place its full trust in you as its herd leader, and you should trust him to behave and obey your commands.
This is the type of relationship that all owners should strive to have with their horses. A relationship founded on trust and discipline that benefits them both. A horse that can ground tie is a well-trained one. This isn’t an easy technique to pull off, but it’s definitely a rewarding one, and one worthy of your time and effort.

